
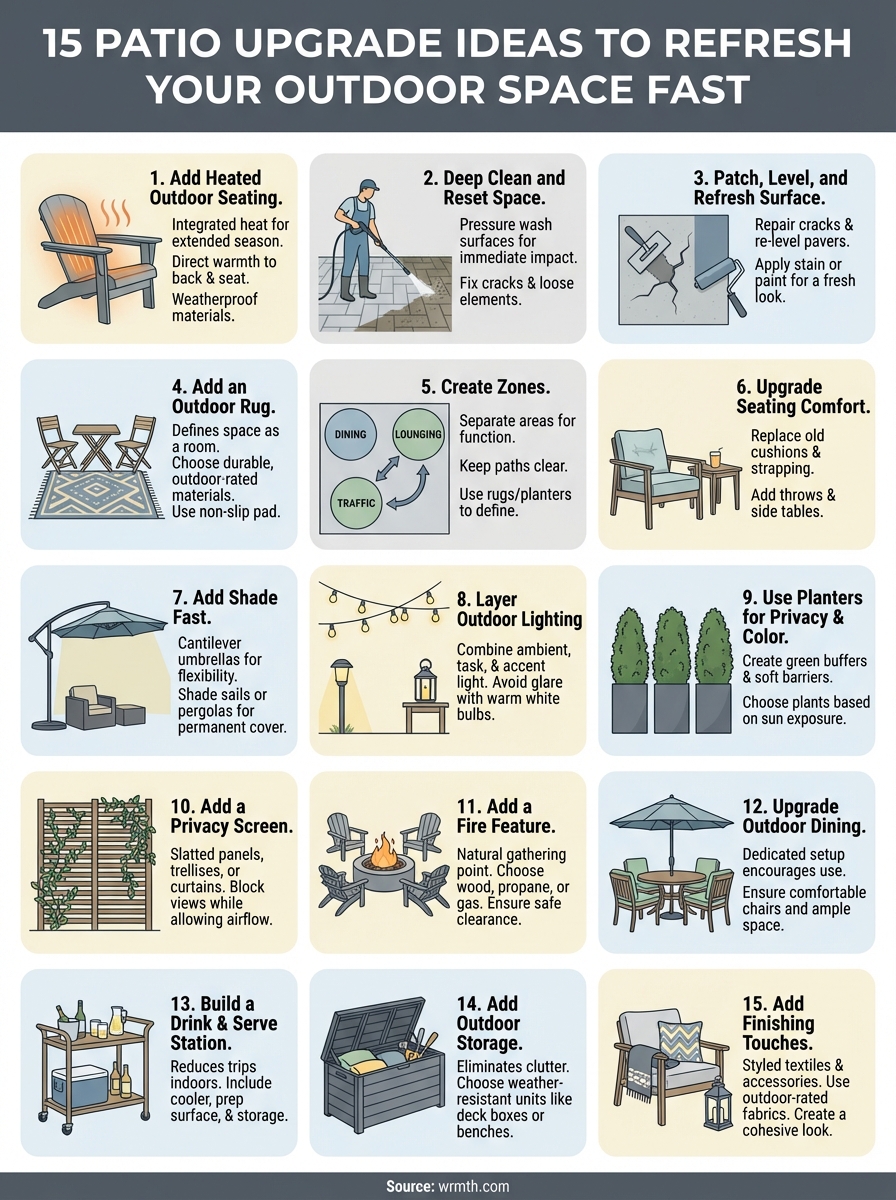
15 Patio Upgrade Ideas To Refresh Your Outdoor Space Fast
Your patio should be the best room in the house, but if it's looking tired, uncomfortable, or underused, a few smart changes can fix that. Whether you're working with a small balcony or a sprawling backyard deck, the right patio upgrade ideas can completely change how you use your outdoor space. And the best part? Not every upgrade requires a contractor or a five-figure budget.
This guide covers 15 practical ways to refresh your patio, from quick cosmetic wins like new lighting and textiles to bigger moves like adding a pergola or an outdoor kitchen. We've organized them so you can pick what fits your budget, your timeline, and how ambitious you're feeling on a Saturday morning. Some of these you can knock out in an afternoon. Others are weekend projects that pay off for years.
One upgrade we're especially passionate about, heated outdoor furniture, can stretch your patio season well beyond summer. At wrmth furniture, we build Muskoka-style chairs with integrated heating elements that let you sit outside comfortably in weather that would normally send everyone indoors. It's a different approach to outdoor comfort, and we'll cover it alongside 14 other ideas that can transform your space starting today.
1. Add Heated Outdoor Seating
Most patio upgrade ideas focus on how a space looks. Heated outdoor seating focuses on whether you actually use the space. If cool spring evenings or chilly fall nights push you inside after an hour, a heated chair solves that problem directly. Instead of a patio heater warming a large bubble of air around you, integrated heating elements built into the chair deliver warmth where it matters: your back and your seat.
What to upgrade and why it changes everything
Traditional outdoor furniture leaves you layering blankets and nursing a warm drink just to stay comfortable past 7 PM. Heated Muskoka-style chairs, like the Summit from wrmth furniture, flip that dynamic entirely. The heat comes from dry heating elements embedded in the chair, providing direct therapeutic warmth to your lower back and seat. That warmth also has a practical health angle, as sustained dry heat can help ease chronic back pain and stiff joints after a long day outdoors.
Dry heat applied directly to the body is clinically associated with reduced muscle tension and improved circulation, which makes heated seating genuinely useful rather than just a novelty.
How to choose safe, outdoor-rated heated chairs
Not all heated outdoor furniture is built the same. You want a chair rated for actual outdoor exposure, not a product that struggles with rain or humidity. Look for weatherproof materials like UV-stabilized HDPE or marine-grade components, and confirm the heating system carries appropriate safety certifications for outdoor use. Wrmth chairs are made in North America and built specifically for open-air environments, including decks, docks, and exposed patios.
Where heated seating fits best on a patio layout
Heated chairs work best in your primary lounging zone, which is typically the area where people naturally settle after dinner. Place them facing a view, a fire feature, or each other, and keep a side table within reach for drinks. Avoid positioning them in high-traffic corridors between your door and grill, since the lounging area should feel settled and intentional rather than like a secondary afterthought.
Cost and timeline expectations
Wrmth chairs sit at a premium price point that reflects the built-in heating technology and North American manufacturing.
2. Deep Clean and Reset the Space
Before you spend a dollar on new furniture or decor, a thorough deep clean can make your patio look like a completely different space. Grime, algae, and years of weathering dull every surface, and removing that buildup is one of the fastest patio upgrade ideas with the most immediate payoff. You can complete most of this work in a single morning with basic tools you probably already own or can rent cheaply.
What to clean first for the biggest visual payoff
Start with your largest surfaces: the floor, any boundary walls or fences, and your furniture frames. Surface staining and algae growth do the most damage to how a patio reads overall, so tackling them first gives you an immediate sense of progress. Work top to bottom so debris and runoff lands on areas you haven't cleaned yet.
A single pressure wash session can make a five-year-old concrete slab look nearly new without any resurfacing costs.
The fast method for concrete, pavers, brick, and wood
A pressure washer handles concrete, brick, and pavers efficiently. For wood decking, drop to a lower pressure setting (around 500 to 600 PSI) to avoid raising the grain or splintering boards. Composite decking responds well to a garden hose and stiff deck brush with a mild soap solution, which prevents the streaking that high-pressure water can cause on composite materials.
What to fix while you clean
Cleaning naturally exposes damage you've been overlooking. Note any cracked pavers, loose joints, or soft wood spots as you go. Catching these issues now stops them from getting worse through the next freeze-thaw cycle, and you'll already have the area cleared for quick repairs.
Cost and timeline expectations
- Time: 2 to 4 hours for most patios
- Pressure washer rental: $40 to $100 per day
- Cleaners and brushes: $20 to $40
- Total cost: $60 to $140 for a full reset
3. Patch, Level, and Refresh the Patio Surface
A damaged or uneven patio surface undermines every other patio upgrade idea you layer on top of it. New furniture on a cracked slab still looks like a problem waiting to get worse. Addressing the surface first gives every other improvement a solid foundation, and most repairs take just a few hours with basic supplies from your local hardware store.
When you should repair vs. replace
Most patio surfaces are worth repairing unless the structural damage is widespread. A few cracks, a couple of sunken pavers, or minor surface spalling does not warrant a full tear-out. Consider replacement only when more than 30 to 40 percent of the surface is compromised or when the base underneath has shifted significantly.
Replacing a full patio surface typically costs three to five times more than patching, so make that call carefully before committing.
Quick fixes for cracks, loose pavers, and wobbly areas
Concrete cracks respond well to self-leveling concrete caulk or vinyl patching compound for wider gaps. Loose pavers need old mortar or sand cleared from beneath them, then reset with fresh polymeric sand or mortar. Wobbly flagstones typically need fresh mortar bedding, which takes about 20 minutes per stone to sort out properly.
- Hairline cracks: self-leveling concrete caulk
- Wide cracks and spalling: vinyl patching compound
- Sunken pavers: re-level with fresh sand and compact firmly
Easy surface upgrades like stain, paint, and stencil
Once repairs are finished, a concrete stain or solid-color patio paint gives the surface a completely fresh look in a single weekend. Concrete stencils let you add a faux tile or geometric pattern for very little cost. Sealing the finished surface protects your work and extends the life of the finish through multiple seasons.
- Acid stain: permanent color that soaks directly into concrete
- Solid paint: full coverage, ideal for hiding old imperfections
- Stencil: low-cost pattern applied over any base coat
Cost and timeline expectations
- Crack patching: $10 to $30 in materials, 1 to 2 hours
- Paver reset: $20 to $50 per section, 2 to 4 hours
- Stain or paint: $80 to $200 for materials, one weekend
4. Add an Outdoor Rug to Define the Space
An outdoor rug is one of the lowest-cost patio upgrade ideas that delivers an outsized visual result. A bare concrete or paver floor reads as a utility surface. The moment you add a rug, the space reads as a room, and everything else you place on top of it looks more intentional.
How a rug makes a patio feel like a room
A rug creates a visual boundary that anchors your furniture grouping and tells guests where to sit. Without it, chairs and tables can feel scattered and disconnected from each other. Placing a rug underneath your seating arrangement pulls everything together and defines the lounging or dining zone in a way that paint, planters, or lighting simply cannot replicate.
A properly sized rug is the single fastest way to make outdoor furniture look like it belongs together rather than like pieces you pulled from storage.
How to pick the right size and material
Your rug should extend at least 18 inches beyond the front legs of your seating or dining furniture on all sides. Polypropylene and recycled plastic rugs handle moisture, UV exposure, and foot traffic far better than natural fiber options. Flatweave styles dry fastest and resist mold better than looped or shaggy constructions, which trap water underneath.
How to keep it from sliding, curling, and mildewing
Place a non-slip rug pad rated for outdoor use underneath the rug to prevent shifting on smooth surfaces. Lift and air out the rug every few weeks, especially after heavy rain, to stop mildew from forming on the underside. Securing curled corners with rug tape or furniture weight prevents trip hazards and keeps the rug looking flat.
Cost and timeline expectations
- Outdoor rug (6x9 ft): $60 to $250 depending on material and pattern
- Non-slip rug pad: $20 to $50
- Time to set up: 30 minutes
- Total cost: $80 to $300
5. Create Zones for Dining, Lounging, and Traffic Flow
Zoning is one of the most overlooked patio upgrade ideas, yet it makes the biggest difference in how usable your space feels day to day. Without clear zones, furniture gets pushed against walls, guests cluster awkwardly, and the patio ends up feeling like a storage area that happens to have chairs. Defining separate areas for dining, lounging, and movement turns a flat slab into a space people actually want to spend time in.
The simple zoning rules that prevent a cluttered layout
Each zone needs a defined footprint and a clear purpose. Your dining zone should have enough room for pulled-out chairs without blocking foot traffic. Your lounging area needs breathing room around each seat. Keep at least 36 inches of clear path for walkways, and never position furniture so that guests have to squeeze past each other to move from one area to another.
A cluttered layout is almost always a zoning problem, not a furniture problem.
Sample layouts for small, medium, and large patios
- Small patio (under 150 sq ft): One zone only. Combine dining and lounging with a bistro set or small loveseat arrangement.
- Medium patio (150 to 400 sq ft): Two zones. Separate dining from lounging with a rug or planter as a visual divider.
- Large patio (over 400 sq ft): Three zones. Add a dedicated lounge, a dining area, and a transition space near the grill or door.
How to handle doors, grills, and walkways
Keep the main door path completely clear as your primary traffic corridor. Position your grill at least 10 feet from seating and never in a walkway. Side tables and plants work well as soft barriers that guide traffic without blocking sightlines.
Cost and timeline expectations
- Zoning with furniture repositioning: Free, 1 to 2 hours
- Rugs and planters as zone dividers: $80 to $300
- Time to plan and rearrange: One afternoon
6. Upgrade Seating Comfort Without Replacing Everything
Your existing furniture may have solid frames, but worn-out cushions and missing accessories make the whole setup feel uncomfortable and dated. Targeted comfort upgrades are among the most cost-effective patio upgrade ideas because they fix exactly what frustrates you without the expense of replacing everything.
The quickest comfort upgrades that feel new
Swapping cushion covers or adding new seat pads refreshes your furniture in under 10 minutes. Replacement cushion kits are widely available for most standard chair dimensions, and worn strapping on sling chairs can be replaced inexpensively with kits from most hardware stores. Quick wins to consider:
- Replace seat and back cushions with fresh foam-filled pads
- Add armrest covers or wraparound cushion ties for a snug fit
- Swap out faded or cracked furniture feet with rubber caps
How to choose cushions, back support, and side tables
Look for cushions with at least 3-inch high-density foam rather than thin decorative pads that flatten after one season. Solution-dyed acrylic fabrics like Sunbrella resist UV fading and dry fast after rain. A side table within arm's reach of every seat removes the awkward drink-balancing problem that quietly discourages people from staying outside longer.
Quality cushions and nearby side tables consistently make the difference between a patio people use for 20 minutes and one they stay on for hours.
How to add warmth and comfort for shoulder seasons
When spring and fall temperatures cool off, lightweight outdoor throws extend how long you'll realistically sit outside. For a lasting solution, a heated chair like the wrmth Summit delivers direct dry heat to your back and seat, so you stay comfortable without piling on layers.
Cost and timeline expectations
- New cushion set: $40 to $150
- Side tables: $30 to $120 each
- Outdoor throws: $25 to $60
- Time to upgrade: 1 to 2 hours
7. Add Shade Fast With the Right Structure
Shade is one of the most practical patio upgrade ideas you can act on, and it directly determines how many hours your space gets used on hot days. Without overhead cover, a patio becomes uncomfortable by midday for most of the summer, which defeats the purpose of building out the space in the first place.
How to choose between umbrellas, sails, and pergolas
Your budget and commitment level drive this decision more than anything else. Cantilever umbrellas offer the most flexibility since you can reposition or store them easily. Shade sails stretch between anchor points and cover larger areas at a lower cost than a pergola, though they require solid mounting hardware. A pergola gives you a permanent structure that can support climbing plants, string lights, and a retractable canopy for full control over coverage.
A cantilever umbrella is the fastest way to add shade without any installation, while a pergola adds lasting structural value to the property.
Shade placement for afternoon sun and glare
Position your shade structure to block west and southwest sun exposure, which is where afternoon heat and glare hit hardest. Measure where the shadow falls at 2 PM to 4 PM during summer, and align your structure to cover your primary seating or dining zone during that window.
Wind, anchoring, and HOA considerations
Umbrellas need weighted bases rated for at least 50 pounds to stay stable in moderate wind. Shade sails require hardware anchored into masonry or structural posts. Check your HOA guidelines before installing any permanent structure, since height and setback rules vary widely.
Cost and timeline expectations
- Cantilever umbrella: $150 to $600, setup in under an hour
- Shade sail: $80 to $300 for materials, one weekend to install
- Pergola kit: $1,500 to $5,000, one to two weekends
8. Layer Outdoor Lighting for Function and Mood
Lighting is one of the most transformative patio upgrade ideas because it determines how your space looks and functions after sunset. Without the right setup, a well-furnished patio feels dark, flat, and uninviting the moment the sun drops. Adding multiple layers of light fixes that completely and extends the hours your patio gets real use.
The three lighting layers every patio needs
Every well-lit patio uses three distinct layers working together. Ambient lighting provides overall illumination so people can see clearly and move safely. Task lighting targets specific areas like your dining table or grill where you need focused visibility. Accent lighting highlights plants, architectural details, or features you want to draw attention to after dark.
Layering all three types creates depth and warmth, while relying on a single overhead fixture produces flat, institutional light that makes outdoor spaces feel uninviting.
Simple options: string lights, path lights, and lanterns
String lights handle ambient light beautifully and install in under an hour with basic hooks or clips. Solar path lights require zero wiring and mark walkways and zone edges clearly. Lanterns placed on side tables or steps add accent light while doubling as decorative elements that work through every season. Battery-powered and solar options remove the need for extension cords entirely.
How to avoid harsh glare and messy cords
Position light sources at or below eye level wherever possible to avoid glare that makes guests squint. Run any wired fixtures along fence lines or deck railings to keep cords out of foot traffic paths. Warm white bulbs in the 2700K to 3000K range produce a relaxed, inviting atmosphere that flatters people and outdoor spaces far better than cool white alternatives.
- Ambient: string lights, overhead lanterns, wall sconces
- Task: pendant lights over dining tables, grill-mounted lights
- Accent: uplights for plants, step lights, lanterns on surfaces
Cost and timeline expectations:
- String lights (20 to 40 ft set): $20 to $80, installed in one hour
- Solar path lights (set of 6 to 8): $25 to $80, no tools required
- Full three-layer setup: $100 to $400 total, one weekend
9. Use Planters to Add Privacy and Color
Planters serve a dual purpose that most patio upgrade ideas skip entirely: they add color and life to bare surfaces while quietly solving the problem of exposed sight lines. A well-placed row of tall planters along a fence line or deck edge creates a green buffer that softens hard surfaces, absorbs noise, and makes your outdoor space feel more enclosed and intentional.
The best plants for patio planters by sun exposure
The plants you choose depend entirely on how much direct sunlight your patio receives each day. Full-sun patios do well with lavender, ornamental grasses, and geraniums. Shaded or partially shaded spaces support hostas, ferns, and impatiens, which stay lush without burning out through summer.
- Full sun (6+ hours): lavender, ornamental grasses, geraniums, petunias
- Partial sun (3 to 6 hours): begonias, coleus, salvia
- Shade (under 3 hours): hostas, ferns, impatiens, astilbe
How to add height with tall planters and small trees
Tall planters filled with columnar shrubs or small ornamental trees create privacy that feels permanent rather than temporary. Position them at the corners of your seating area or along property lines where exposure is greatest. Good options that fit standard large planters include:
- Dwarf arborvitae: dense, evergreen, grows to 5 to 8 feet
- Columnar juniper: narrow footprint, works in tight spaces
- Clumping bamboo: fast-growing and non-invasive in containers
A single large planter with a 6-foot columnar shrub blocks more sightline than an entire row of small decorative pots.
Low-maintenance watering and drainage setups
Every planter needs drainage holes and a layer of gravel at the base to prevent root rot from standing water. Self-watering inserts reduce how often you need to water and keep soil moisture consistent through hot stretches without daily attention. Grouping planters together also slows water loss through evaporation and makes your watering routine faster.
Cost and timeline expectations
- Small planters with annuals: $15 to $40 each, planted in minutes
- Large planters with shrubs or small trees: $80 to $300 each
- Self-watering inserts: $15 to $50 per planter
- Time to set up: One afternoon for a full arrangement
10. Add a Privacy Screen That Looks Intentional
A privacy screen solves one of the most common complaints about patio spaces: the feeling that neighbors or passersby can see everything you do outside. The right screen makes your patio feel enclosed and private without making it feel boxed in, and it adds a design element that ties the space together rather than looking like a quick fix.
Quick privacy options that do not feel temporary
The fastest options that still look deliberate are freestanding lattice panels and modular slatted screens, which you can position and reposition as your layout changes. Pre-built cedar or composite privacy panels attach to existing fence posts or standalone frames in an afternoon. These work especially well when stained or painted to match your existing fence or deck, so they read as intentional features rather than afterthoughts.
A privacy screen that matches your existing materials will always look more purposeful than a mismatched add-on, regardless of cost.
Trellises, slats, curtains, and living walls
Trellises give you structure and greenery in one installation, since climbing plants like clematis or jasmine fill the frame over a single season. Horizontal cedar slats are a modern option that allows partial sightlines while still creating a clear sense of enclosure. Outdoor curtain panels on a tension rod between two posts offer a softer, more flexible option that you can open or close depending on conditions. Living walls built with vertical planter pockets add color and texture while solving privacy at the same time.
How to block views without blocking airflow
Solid panels stop wind, which can make a screened patio feel stuffy on warm days. Slatted or louvered designs let air move through while still cutting sightlines. Spacing slats at 1 to 2 inches apart blocks most views from outside while keeping airflow comfortable.
- Slatted cedar or composite panels: best balance of privacy and airflow
- Lattice with climbing plants: adds greenery, allows air movement
- Outdoor curtains: fully flexible, pulls back when airflow matters most
Cost and timeline expectations:
- Freestanding slatted panel: $80 to $250, installed in a few hours
- Trellis with plants: $40 to $150 plus plant cost, one afternoon
- Outdoor curtain setup: $50 to $150, under an hour
11. Add a Fire Feature for a Natural Gathering Point
A fire feature pulls people together in a way that few other patio upgrade ideas can replicate. The warmth and visual draw of open flame naturally becomes the center of any outdoor gathering and keeps people outside far longer than they planned.
Fire pit types and what to choose for your space
The three main options are wood-burning fire pits, propane units, and natural gas fire tables. Wood-burning pits produce the most authentic experience with crackling sound but require storing dry wood and cleaning out ash after each use. Propane and gas options light instantly, produce no ash, and work well in tighter spaces where smoke drift would bother neighbors.
Safety spacing, surfaces, and local rules
Position any fire feature at least 10 feet from structures, overhangs, and furniture. Place it on a non-combustible surface like concrete, stone, or a fire-rated pad rather than directly on wood decking.
Check your local municipality's open-flame rules before purchasing, since many areas restrict wood-burning fires in residential zones entirely.
Many HOAs and city ordinances require propane or gas alternatives, so confirm the rules before you buy something you cannot legally use in your yard.
Seating layout that makes it feel inviting
Arrange seating in a loose circle or arc around the fire rather than in rigid rows. Leave 24 to 36 inches between the fire edge and the nearest chair for comfortable heat distance without scorching. Side tables near every seat keep drinks within reach and remove the restless shifting that pushes guests to leave early.
Cost and timeline expectations:
- Wood-burning fire pit: $80 to $400, set up in one afternoon
- Propane fire pit or table: $200 to $800, ready to use immediately
- Natural gas fire table: $800 to $3,000+, requires professional gas line installation
12. Upgrade the Patio With an Outdoor Dining Setup
A dedicated outdoor dining setup is one of the most used patio upgrade ideas you can invest in, because it gives your outdoor space a clear purpose that gets activated every single meal you eat outside. Without a proper dining area, people default to eating indoors even when the weather is perfect.
Picking the right table shape for your footprint
Round tables work best on smaller patios because they eliminate sharp corners and keep conversation easy across the whole group. Rectangular tables fit long, narrow spaces and seat more people efficiently when you host larger gatherings. Before you buy anything, tape out the table dimensions on your patio floor and pull chairs out to their full position to confirm you have at least 36 inches of clearance on every side.
A table that fits on paper but leaves no room for pulled-out chairs will frustrate you every single time you sit down to eat.
How to create comfort for longer meals
Chairs with cushioned seats and back support keep guests at the table far longer than hard stools or flat slat chairs that become uncomfortable after 20 minutes. Add a side console or small serving surface nearby so you are not running back inside constantly. Keeping a side table or serving cart within reach of the dining area removes most of the back-and-forth that shortens meals outdoors.
Easy ways to protect the dining area from sun and bugs
A market umbrella centered over your table handles afternoon sun without requiring a permanent structure. Mesh food covers or a basic screen tent attachment keeps insects off food during warm months without blocking airflow.
Cost and timeline expectations
- Dining table and chair set: $300 to $1,500 depending on material and size
- Market umbrella: $80 to $300
- Seat cushions: $40 to $150 for a full set
- Time to set up: One afternoon
13. Build a Simple Drink and Serve Station
A dedicated drink and serve station removes the constant back-and-forth between your kitchen and patio that interrupts every outdoor meal or gathering. This single addition changes how long people naturally stay outside, since everything they need sits within reach.
What to include for real-world use
Stock your station with a cooler or ice bucket, a tray for glasses, and a small prep surface for setting out snacks or condiments. Hanging a few hooks or a small bar for towels and bottle openers keeps the most-reached-for items visible and accessible without cluttering the surface.
A well-stocked serve station means your guests stop asking where things are, and you stop making trips inside every 10 minutes.
Options: bar cart, console table, and storage bench
A bar cart gives you the most flexibility because you can roll it to wherever the action is, including beside the grill or near your fire pit. Console tables against a wall or railing work well for a fixed setup that feels more built-in and permanent. Storage benches double as seating when needed and keep extra supplies organized inside their base, which makes them especially practical for smaller patios.
Where to place it for hosting and everyday meals
Position your station between your dining zone and your lounging area so it serves both spaces without interrupting traffic flow. Keep it close enough to the door that restocking from inside takes seconds rather than a full trip across the patio. This patio upgrade idea rewards smart placement: a well-positioned station becomes the hub of every gathering, while a poorly placed one gets ignored entirely.
Cost and timeline expectations
- Bar cart: $80 to $250, no installation needed
- Console table: $60 to $200
- Storage bench: $100 to $300
- Time to set up: One afternoon
14. Add Outdoor Storage to Eliminate Visual Clutter
Clutter kills the feel of any outdoor space faster than worn furniture or dated decor. When cushions pile on chairs, hoses snake across the floor, and tools lean against walls, your patio looks like a work area rather than a place to relax. Adding dedicated outdoor storage is one of the most underrated patio upgrade ideas because it makes every other improvement look sharper by keeping the space tidy.
What to store outside and what to keep indoors
Keep weather-resistant items like cushions, throws, garden tools, and hoses in outdoor storage. Bring electronics, paper goods, and anything with metal components inside, since outdoor storage units reduce moisture exposure but do not eliminate it entirely. A simple rule: if it would rust or warp in a humid garage, it belongs indoors.
Storage options that double as furniture
Deck boxes and storage ottomans solve two problems at once by holding supplies inside while providing extra seating or a surface when closed. A storage bench along a fence or railing edge adds seating capacity while hiding the items you reach for regularly. Built-in bench storage along a deck perimeter maximizes every square foot without adding bulk to the layout.
Storage that doubles as seating earns its footprint twice over, which matters most on smaller patios where every piece needs to justify its space.
Weatherproofing basics that prevent mold and rust
Choose units made from resin, powder-coated aluminum, or teak rather than raw wood or untreated metal. Line the interior base with a breathable mat to prevent moisture pooling at the bottom.
Cost and timeline expectations
- Deck box (100 to 150 gallon): $100 to $350
- Storage bench: $120 to $300
- Time to set up: One afternoon
15. Add Finishing Touches That Make It Feel Styled
The finishing layer is what separates a functional patio from one that feels deliberately put together. These small patio upgrade ideas cost very little but create a strong visual impression because they signal that someone cared about the details.
Textiles and accessories that work outdoors
Outdoor-rated textiles handle UV exposure, moisture, and temperature swings that would destroy standard indoor fabrics within a season. Look for solution-dyed acrylic or polyester materials rather than cotton blends, which absorb water and develop mildew quickly. Accessories like lanterns, ceramic planters, and weather-resistant trays also hold up through rain and heat without fading or cracking.
The fastest "designer" upgrades: pillows, throws, and decor
Swapping out a few throw pillows is one of the fastest ways to update your space without moving a single piece of furniture. Two or three coordinating pillow covers on your seating, combined with a neatly folded outdoor throw draped over one chair arm, immediately makes the arrangement look styled rather than accidental.
Styled details communicate that a space is meant to be used and enjoyed, which makes guests feel comfortable settling in rather than sitting on the edge of their seats.
How to keep it cohesive with a simple color plan
Pick one primary color and one or two accent colors and apply them consistently across your textiles, planters, and small decor items. You do not need to match perfectly, but keeping your choices within the same tone range prevents the scattered look that makes a patio feel unfinished.
Cost and timeline expectations
- Throw pillows (set of 4): $40 to $120
- Outdoor throw blanket: $25 to $60
- Decorative accessories: $20 to $80
- Time to style: 30 minutes to 1 hour
Quick Next Steps
You now have 15 concrete patio upgrade ideas to work through, from a thorough deep clean all the way to finishing textiles that make your space feel styled. The smartest move is to pick one or two upgrades that address your biggest frustrations first rather than trying to tackle everything at once. A single afternoon of work on the right problem will change how much you actually use your patio.
Start with whatever delivers the fastest visible result for your situation. If cool evenings push you inside before you are ready to go, heated outdoor seating deserves a serious look. The wrmth Summit chair delivers direct dry heat to your back and seat so you can stay outside comfortably through spring and fall.